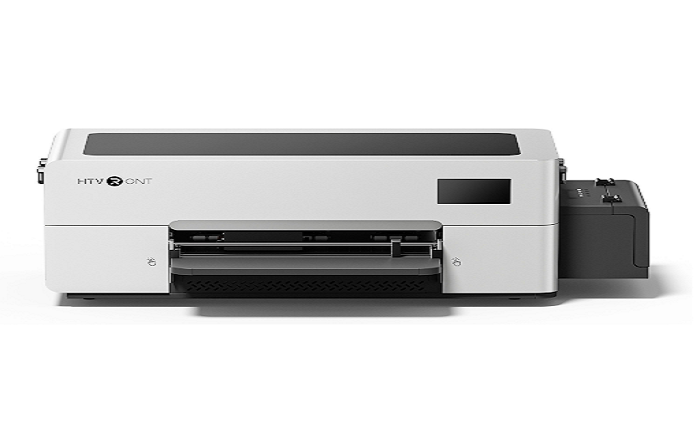
Direct to Film printing has become a practical option for people who want to create custom apparel without investing in a large commercial production facility. The process allows artwork to be printed onto a special film, prepared with adhesive powder, cured, and then transferred onto a garment with controlled heat and pressure. For small businesses, home-based creators, and growing print shops, this workflow can offer a flexible way to produce detailed custom shirts.
A successful DTF setup depends on more than the printer itself. Each stage affects the next one, so print quality, powder application, curing, pressing, garment selection, and maintenance all need attention. A problem that begins during artwork preparation or printing can become much more noticeable when the final transfer is applied to a shirt.
The equipment also needs to match the creator’s production goals. Someone making occasional personalized shirts may have different requirements from a business fulfilling dozens of orders each week. Understanding the complete process makes it easier to choose equipment based on actual needs instead of focusing only on individual specifications.
A typical workflow can include an htvront dtf printer, PET transfer film, DTF ink, adhesive powder, a curing system such as a DTF Oven, and a reliable shirt heat press. When these stages are handled carefully, the result can be a clean and durable transfer suitable for many custom apparel projects.
Preparing Artwork for a Successful DTF Transfer
The DTF process starts long before ink reaches the transfer film. Good artwork preparation is important because the quality of the original design influences the quality of the final print. A design should have sufficient resolution, clear edges, and dimensions appropriate for the garment. Enlarging a low-resolution image too much can result in soft edges or visible pixelation.
Color management also deserves attention. What appears on a computer screen may not look exactly the same after printing, so creators should become familiar with their design and printing software. DTF printing commonly uses color inks together with white ink, allowing designs to be transferred onto both light and dark garments. Preparing artwork correctly helps reduce unexpected results and unnecessary test prints.
The background of an image is another detail that can cause problems. If a design is supposed to have a transparent background, the file should be prepared accordingly. Unwanted background elements can become part of the printed transfer and may be difficult to remove later. Before sending artwork to the printer, check the design at its actual intended size rather than relying only on a small preview.
It is also useful to consider the final garment during the design stage. A large graphic may look attractive on a screen but feel oversized on a small shirt. Similarly, thin lines and very small details may be harder to reproduce consistently than larger elements. Planning the artwork around the garment, print area, and intended audience can prevent wasted film and ink.
For beginners, creating a repeatable artwork checklist is a simple way to improve consistency. Verify image resolution, dimensions, transparency, colors, and placement before every production run. These small checks can save considerable material and time as order volume grows.
How an HTVRONT DTF Printer Fits Into the Workflow
The printer is the central part of a DTF production system because it places the artwork onto PET transfer film using DTF inks. The htvront dtf printer collection includes dedicated DTF equipment and related supplies. HTVRONT’s current information explains that DTF printing requires specialized DTF ink, PET film, and adhesive powder rather than standard sublimation materials.
Once artwork is prepared, the transfer film is loaded according to the printer’s instructions. The design is then printed onto the film, creating the image that will eventually be transferred to the garment. White ink is particularly important for DTF applications because it provides a foundation that helps colorful artwork remain visible on darker fabrics.
Print consistency depends on several factors rather than the printer alone. Ink condition, film quality, environmental conditions, software settings, and maintenance can all affect the result. A printer may be capable of producing excellent output, but poor maintenance or incorrect settings can still create banding, missing areas, color differences, or other problems.
White ink deserves special attention because it can behave differently from the other inks used in the printing process. Proper circulation and maintenance procedures should be followed according to the equipment manufacturer’s instructions. HTVRONT’s current DTF information describes maintenance features on its D1 and D2 models, including white ink management and cleaning functions, but users should still follow the specific care instructions for their machine.
Testing is one of the best ways to establish a dependable production routine. Instead of immediately printing a large batch, create a test transfer and inspect the colors, edges, white layer, and overall appearance. If something looks wrong, investigate the cause before using additional materials. This approach can significantly reduce waste and make production more predictable.
Applying Powder and Curing the Printed Film
After the design has been printed, hot-melt adhesive powder needs to be applied to the wet ink. The powder creates the adhesive layer that will later bond the printed design to the garment. Even coverage is important because areas with too little or too much powder can affect the final transfer.
Powder handling should be done carefully and according to the instructions for the specific materials being used. Excess powder should not simply remain attached to areas outside the printed design. A clean production process helps reduce contamination and unnecessary material use while keeping the transfer surface consistent.
The next stage is curing. A DTF Oven is designed for the curing stage, where controlled heat melts and prepares the adhesive powder for garment application. HTVRONT’s current DTF guidance describes curing as a distinct stage between powder application and heat pressing.
Curing temperature and time should never be treated as universal numbers for every project. Different powders, films, equipment, and production conditions can require different settings. The safest approach is to follow the material manufacturer’s recommended process and verify the result with testing. A transfer that is not sufficiently cured may not bond correctly, while excessive heat can also create problems.
A dedicated curing system can make the workflow more repeatable because the transfer can be processed under controlled conditions. This becomes increasingly useful when production volume increases. For a small business, consistency matters because every customer expects the same quality whether they order one shirt or a larger batch.
The curing stage should also be treated as part of quality control. Before moving a transfer to the heat press, check that the adhesive has been properly melted and that the design remains intact. Establishing a consistent curing routine can help reduce failed transfers and unnecessary reprints.
Applying DTF Transfers With a Shirt Heat Press
Once the transfer has been printed and cured, the final application takes place with a heat press. A shirt heat press provides controlled heat and pressure across the transfer area. HTVRONT’s current shirt press collection includes machines intended for applications such as DTF, HTV, and other heat-transfer projects.
Garment preparation is important before pressing. The shirt should be placed smoothly on the platen, with wrinkles and moisture addressed before the transfer is positioned. A quick pre-press may help remove moisture and flatten the application area, but the correct procedure should always follow the garment and transfer manufacturer’s recommendations.
Positioning deserves just as much attention as temperature and pressure. A design that is slightly crooked can make an otherwise high-quality shirt look unprofessional. Using alignment guides or measuring the garment before placement can improve consistency, especially when producing multiple shirts with the same design.
The correct pressing conditions depend on the particular transfer film, adhesive, garment, and equipment. There is no single setting that should automatically be used for every DTF project. Follow the instructions supplied with the transfer materials and press, then test the combination before beginning a large order.
Peeling is another stage where instructions matter. Some transfers require a specific peel temperature or waiting period. Removing the film too early or using the wrong technique can affect the appearance and adhesion of the design. After peeling, some transfer systems may also call for a finishing press. Again, the material manufacturer’s instructions should take priority.
The finished shirt should be inspected after pressing. Look for lifted edges, incomplete adhesion, wrinkles, or other visible defects. Quality control at this point is much easier than dealing with customer complaints after an order has been shipped.
Choosing Garments and Improving Production Efficiency
Not every shirt behaves in exactly the same way during DTF application. Cotton, polyester, blends, and specialty fabrics can have different characteristics when exposed to heat and pressure. Before selecting garments for commercial production, test the transfer on the exact material and color you intend to sell.
Garment thickness and surface texture can also affect the application process. A smooth, stable fabric may behave differently from a textured or stretchy material. Some garments may also require different preparation or pressing approaches. Testing helps determine whether the chosen combination produces the appearance and durability expected by the customer.
Production efficiency improves when each stage is organized. Keep blank garments, films, inks, powders, and finished transfers arranged so that unnecessary movement is reduced. Labeling different materials can also prevent mistakes, particularly when a business works with several garment types or transfer settings.
Material waste is another area where careful planning can make a noticeable difference. Before printing, confirm the design dimensions and arrange multiple suitable designs efficiently on the film when the workflow allows it. However, saving space should never compromise the required spacing or processing requirements of the materials.
Batch production can also improve efficiency. If several orders use the same garment type and similar transfer settings, organizing them into manageable production groups can reduce repeated setup work. At the same time, each batch should still receive quality checks so that small problems do not continue through an entire order.
Record keeping can become valuable as production grows. Keep notes about successful settings, garment types, transfer materials, and recurring issues. This creates a practical reference for future jobs and makes it easier to reproduce successful results without relying entirely on memory.
Maintaining Equipment and Avoiding Common DTF Mistakes
Regular maintenance is essential for reliable DTF production. Inkjet printing equipment requires particular attention because dried ink or poor ink circulation can affect print quality. Follow the printer manufacturer’s maintenance schedule and use only compatible materials and cleaning products.
One common mistake is treating DTF printing like ordinary office printing. DTF systems use specialized inks and transfer materials, so the complete process requires dedicated supplies and appropriate handling. HTVRONT specifically notes that standard sublimation printers and DTF workflows are not interchangeable without significant modification, which is why using equipment and materials designed for the intended process is important.
Another frequent problem is skipping test prints. A design may look perfect on a computer but reveal issues during printing, curing, or pressing. Testing a small sample before committing to a larger order can identify problems with color, powder coverage, curing, placement, or adhesion.
Poor curing is another issue that can undermine the final result. The adhesive needs to be processed correctly before the transfer is applied. If the powder has not been properly cured, the transfer may not perform as expected. Following the material supplier’s curing instructions and testing wash durability when appropriate can help establish confidence in the workflow.
Incorrect heat press settings can also cause problems. Too little heat, insufficient pressure, or an inappropriate application time may prevent the adhesive from bonding properly. Excessive heat or pressure can create different issues depending on the garment and transfer. For that reason, avoid copying settings from an unrelated project and instead use the specifications provided for the materials being used.
Finally, do not overlook the workspace itself. Dust, loose powder, spilled ink, and poor organization can create avoidable production problems. A clean workspace, consistent procedures, routine equipment checks, and careful testing provide a strong foundation for producing better DTF apparel.
Conclusion
Building a reliable DTF shirt printing workflow involves several connected stages, and each one deserves attention. The process begins with well-prepared artwork and continues through printing, powder application, curing, and final heat pressing. Treating every stage as part of one complete system makes it easier to identify problems and improve production quality.
An htvront dtf printer can serve as the printing component of the workflow, while a DTF Oven supports the curing stage. A dependable shirt heat press then provides the controlled heat and pressure needed to apply the finished transfer to the garment. The right combination depends on production volume, materials, workspace, budget, and the requirements of the individual project.
For beginners and small business owners, the best approach is to start with a repeatable process rather than rushing to increase production. Test artwork, materials, curing conditions, and pressing settings before fulfilling larger orders. Keep equipment maintained, track successful settings, and inspect finished garments consistently.
With careful preparation and a focus on quality at every stage, DTF printing can become a practical way to produce custom apparel while reducing avoidable waste and creating a more organized production workflow.